S3 Website Complete Setup
Hosting a static website on Amazon Web Services’ S3 is extremely cheap and effective. There are many tools these days for helping with this task. We use Jekyll to drive this very website. One frustrating thing about hosting on S3 is getting all of the redirects happening correctly. In our scenario (which is really common), we want the following:
- https://www.portzeroventures.com (Primary Domain)
- https://portzeroventures.com --> Primary Domain (HTTP 301 Redirect)
- http://portzeroventures.com --> Primary Domain (HTTP 301 Redirect)
- http://www.portzeroventures.com --> Primary Domain (HTTP 301 Redirect)
If you follow most of the resources online for setting up static s3 websites, you will find that they miss-out on one or more of these redirection scenarios. Furthermore, some modern browsers add www to the URL, and some will try HTTPS by default, which can obscure the true problem.
This is the architecture we use to host www.portzeroventures.com as a static website on Amazon Web Services S3.

The key that most resources miss is that you need to setup two cloudfront distributions, one for handling the naked domain (e.g. portzeroventures.com), and the other for handling the primary domain (e.g. www.portzeroventures.com). Amazon Web Services has a lot of internal tooling that they have created for connecting resources in a cloud environment. It can be hard to tell what’s going on. After much trial and error, this is the setup that we’ve arrived at that works for our needs.
The rest of this post has the steps required to set everything up. There are three levels that need to be addressed:
- The DNS Level (using Route53) - Routing requests for
www.portzeroventures.comandportzeroventures.com(HTTPS doesn’t matter at this level) to the correct Cloudfront distributions. - The Content Distribution Network Level (using Cloudfront) - Handling HTTPS, but more importantly gathering the website content from the S3 bucket (origin).
- The Application Level (using S3 as a static filesystem) - Holds the actual content of the website.
S3 Setup
- Create a bucket with the same name as your goal website, e.g.
www.portzeroventures.comin our case. Enable static website hosting as shown. -
Upload your static website to this bucket. You should try hitting the bucket URL directly (i.e.
http://www.portzeroventures.com.s3-website-us-east-1.amazonaws.com) to verify the site works.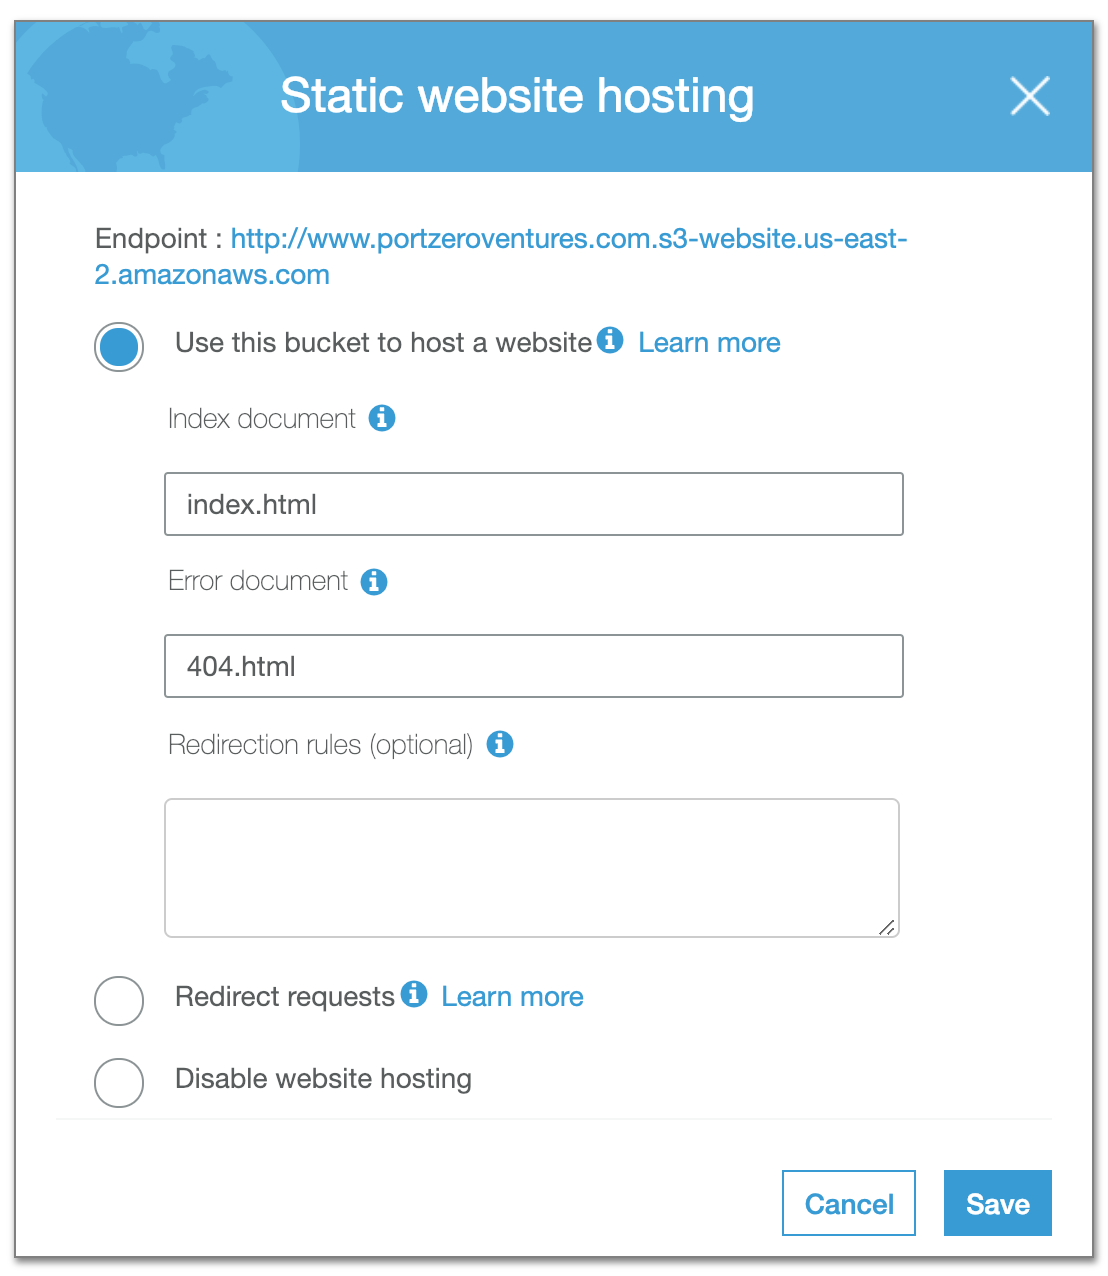
-
Create another empty bucket named
portzeroventures.com. Under “Static website hosting”, configure it to redirect requests towww.portzeroventures.com.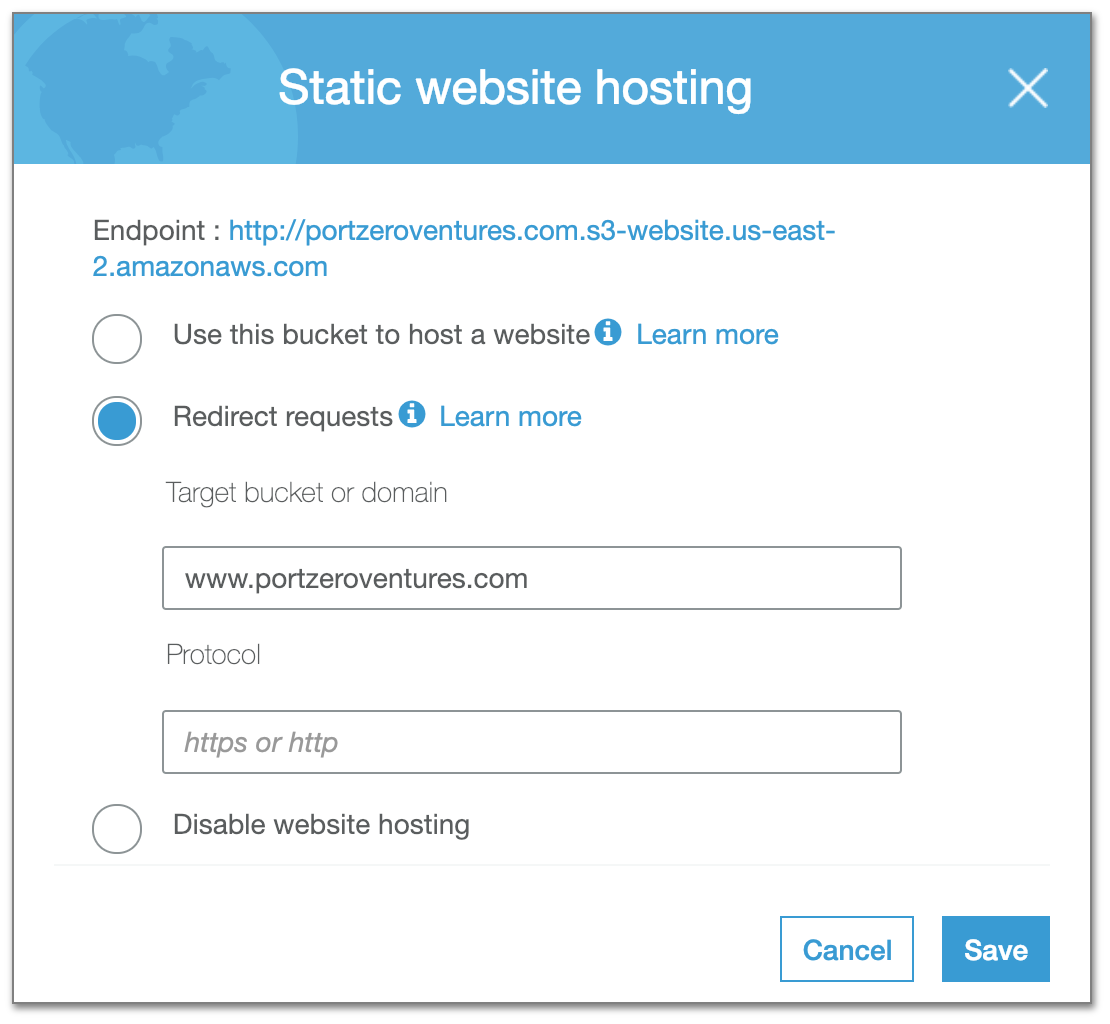
Cloudfront Setup
We need to make two cloudfront distributions, the first serves the true content at https://www.portzeroventures.com. The second serves the “content” of the S3 bucket setup to redirect to the true content.
- Create a cloudfront distribution for serving the primary site.
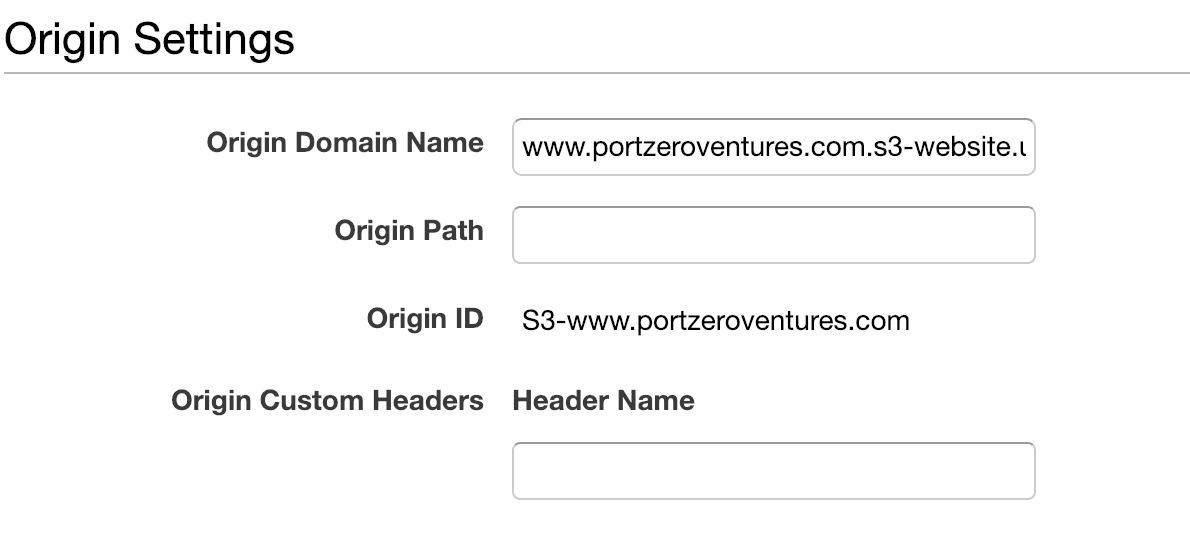
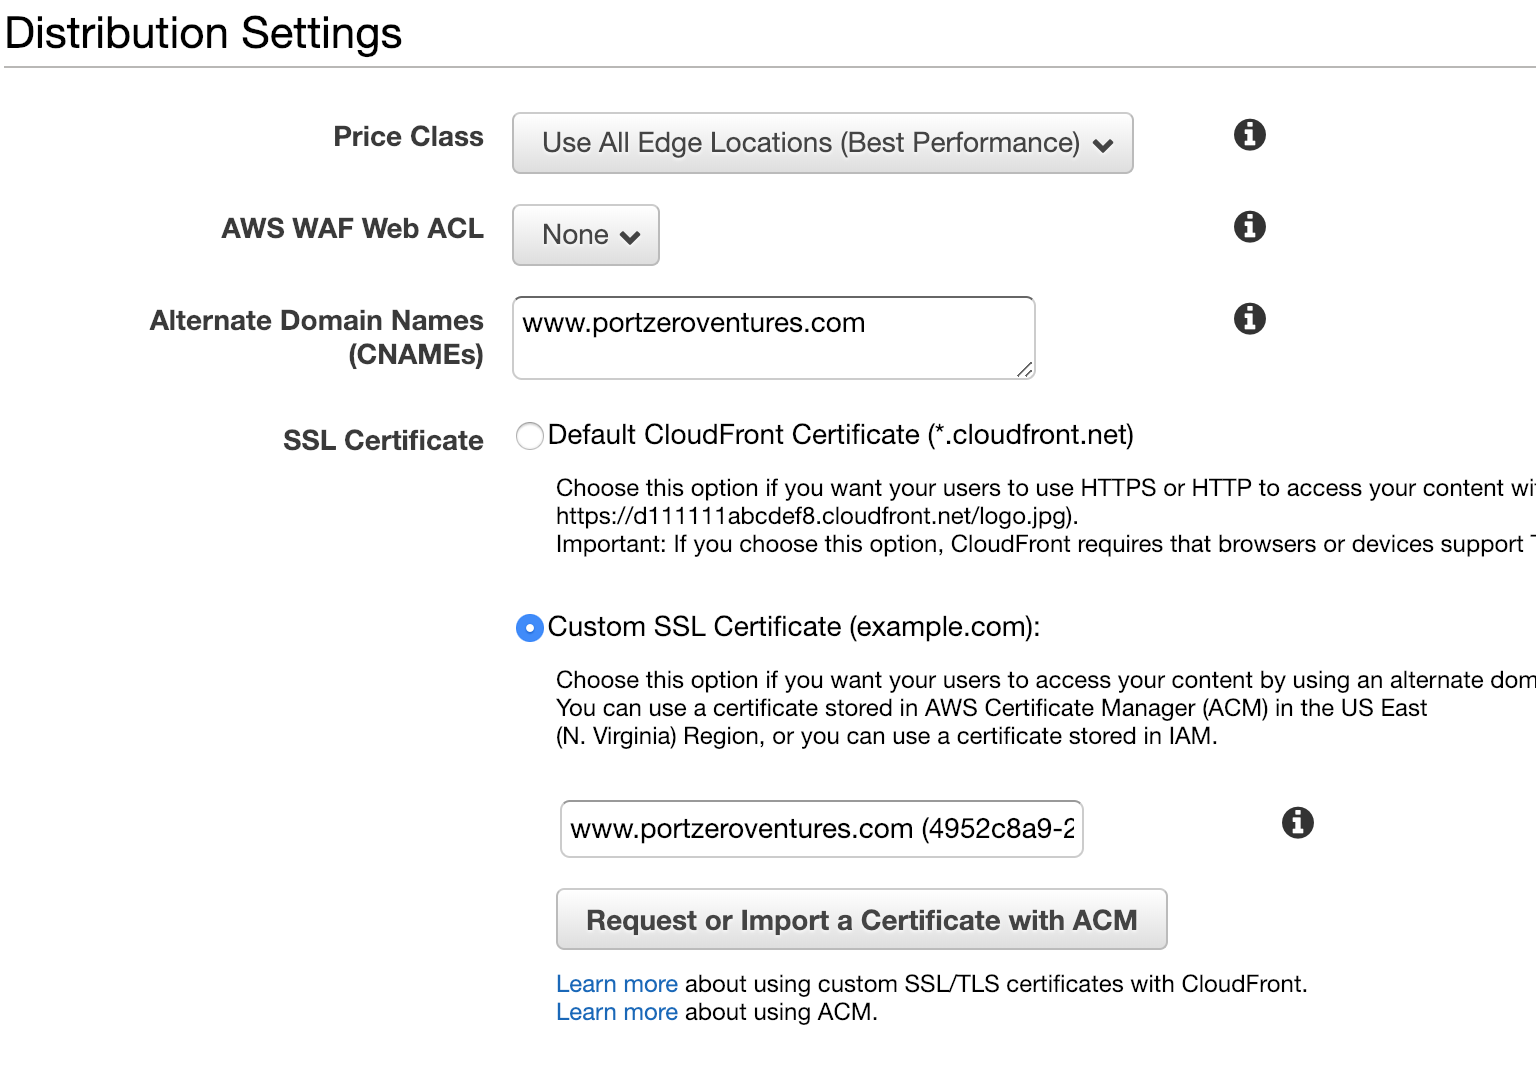
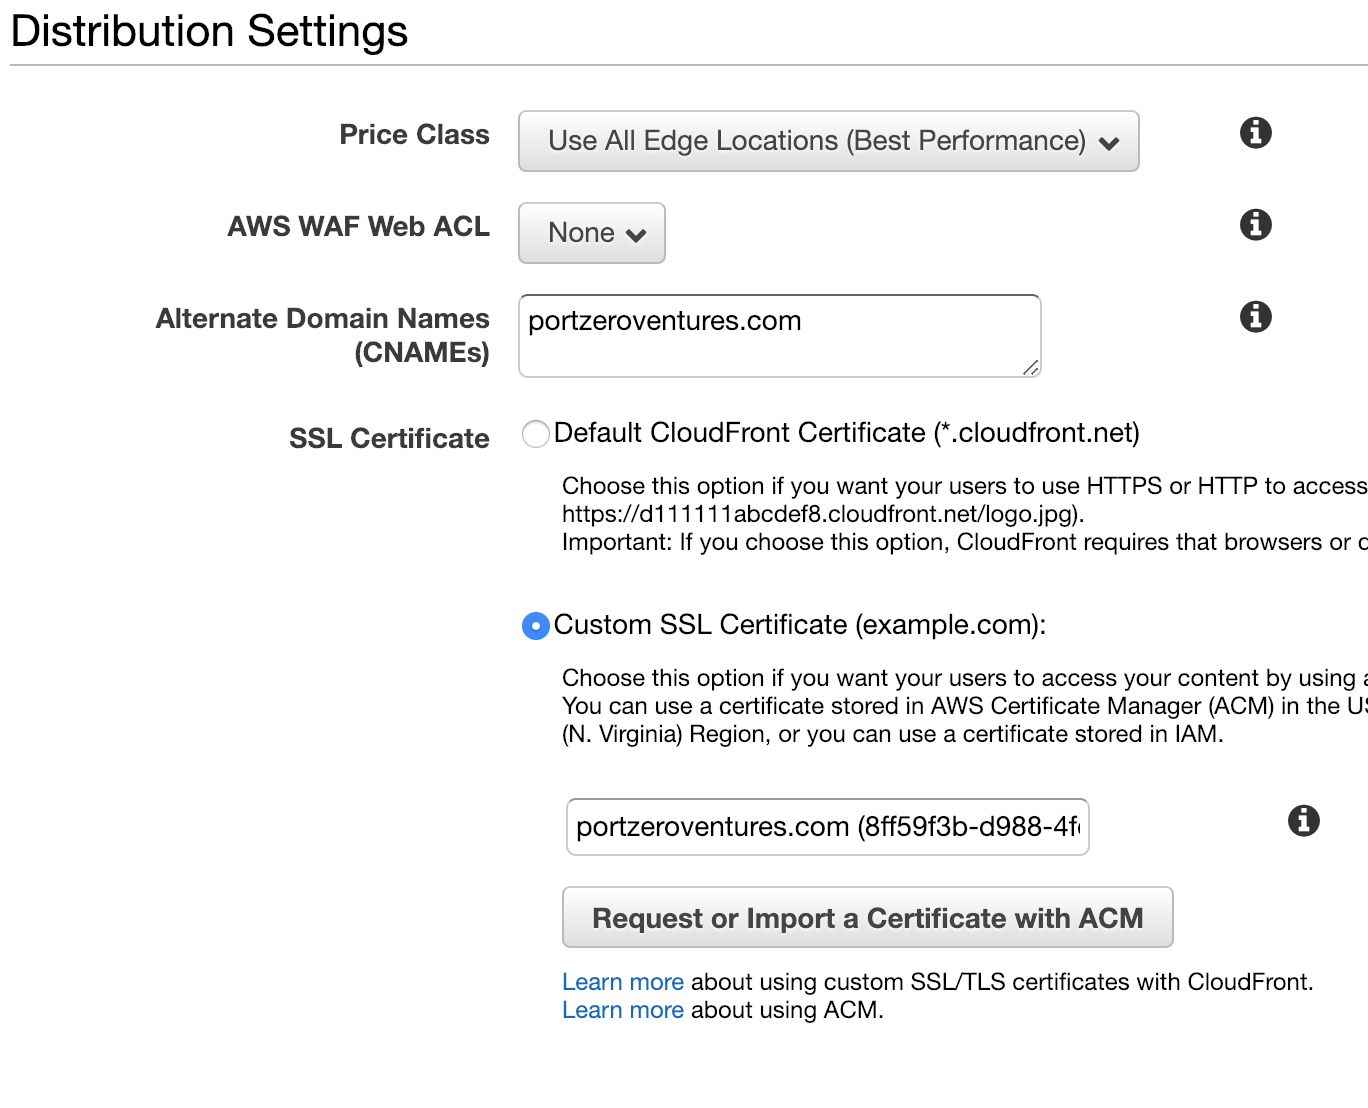
- Add
www.portzeroventures.comas a CNAME - Use a custom SSL certificate, setup for
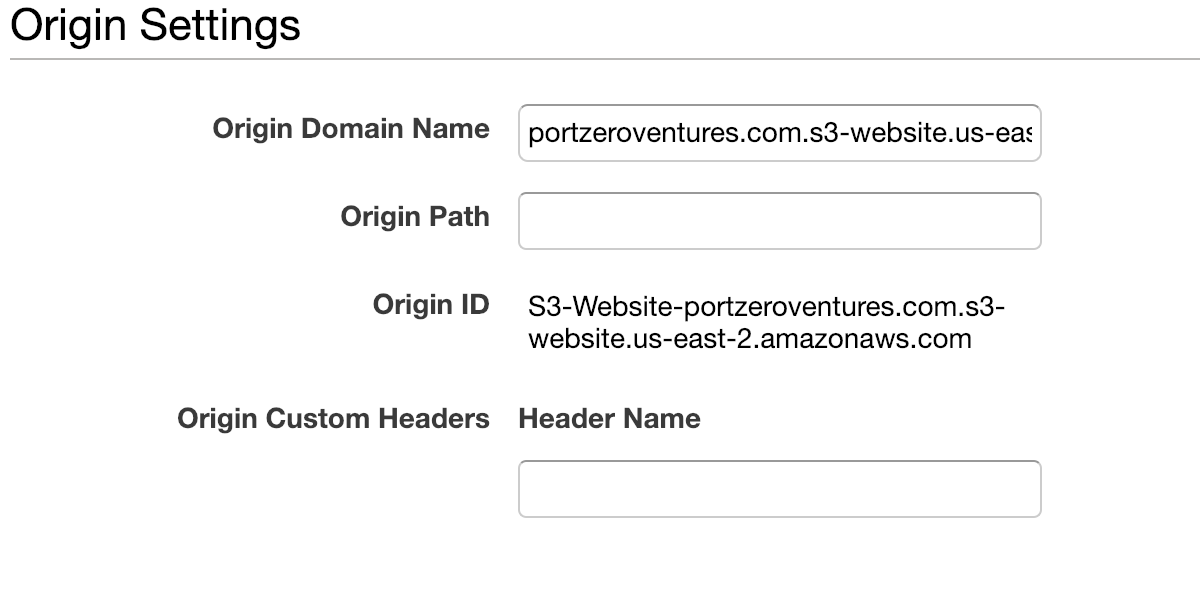
www.portzeroventures.com(You can click the button below to set one up – it isn’t hard) - Create an origin, and for the Origin Domain Name, use the full domain name of the S3 bucket as the value
- It will auto-fill one such as
www.portzeroventures.com.s3.amazonaws.com, but this is INCORRECT! - You need to use
www.portzeroventures.com.s3-website.us-east-1.amazonaws.com.
- It will auto-fill one such as
- Create a behavior for the origin, setting the Viewer Protocol Policy as “Redirect HTTP to HTTPS”
- Add
- Create a cloudfront distribution for redirecting the naked (non-www) domains.
- Add
portzeroventures.comas a CNAME - Use a custom SSL certificate, setup for
portzeroventures.com - Create an origin, and for the Origin Domain Name, use the full domain name of the S3 bucket as the value as before (Use
portzeroventures.com.s3-website.us-east-1.amazonaws.comNOTportzeroventures.com.s3.amazonaws.com) - Create a behavior for the origin as before, setting the Viewer Protocol Policy as “Redirect HTTP to HTTPS”
- Add
Route53 Setup
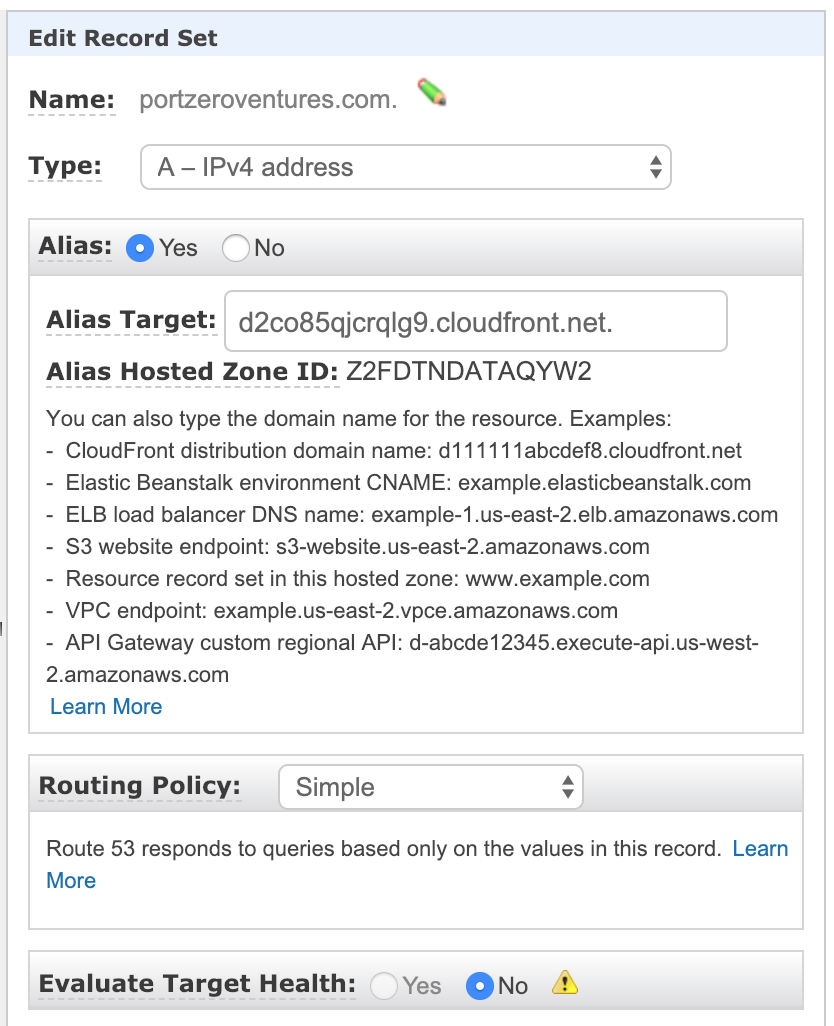
- Create an “A” record in route53 for the primary domain,
www.portzeroventures.com. Make it as an alias to the full cloudfront domain name for the primary cloudfront distribution, e.g.d1j1qwwijgvt8y.cloudfront.net. The domain name for the cloudfront distribution can be found in cloudfront. Do not use the pre-filled dropdown values, they will lead you wrong. -
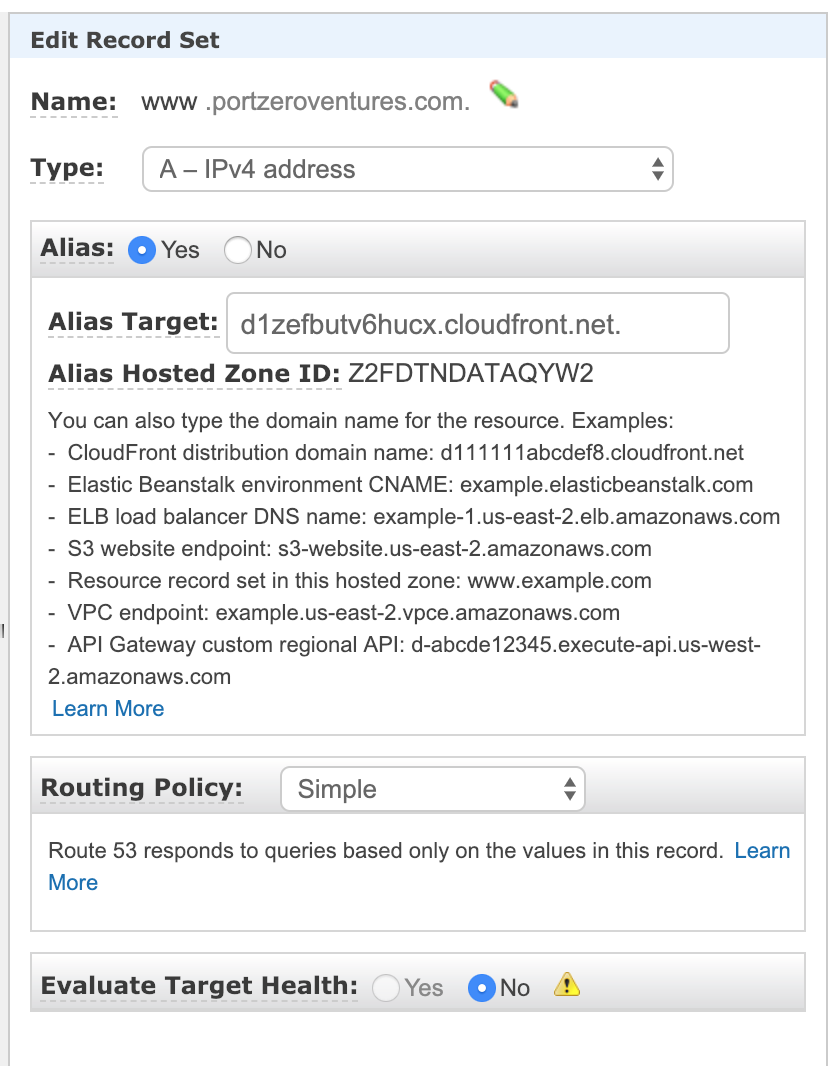
Create another “A” record for the naked (non-www) domain, pointing to the redirect cloudfront distribution that we setup.
Pro Tip:
Use curl with the -v (verbose) flag to verify the redirects are all happening correctly. Your browser and its plugins (e.g. HTTPS everywhere) can hide the true behavior of your setup.